Showing posts with label big shot. Show all posts

Wednesday, July 17, 2013

using up your stash

stash
it is a nasty word
especially when you have a bit of it and need to use it up
i am trying to cut down on my random purchases this year and use what i have got first
HAHAAHAHAHAAHAHAHAAHAAHA i hear you laughing because WHAT CRAFTER IN THEIR RIGHT MIND hasn't said that before riiiiight?!

anyways my friend sal gives us cardmakers these really cool swaps to do over at essential baby  and i try really hard to use stuff that i haven't touched at all or can't remember the last time i used it. our challenge was to do a centre step card and use stripes and people.
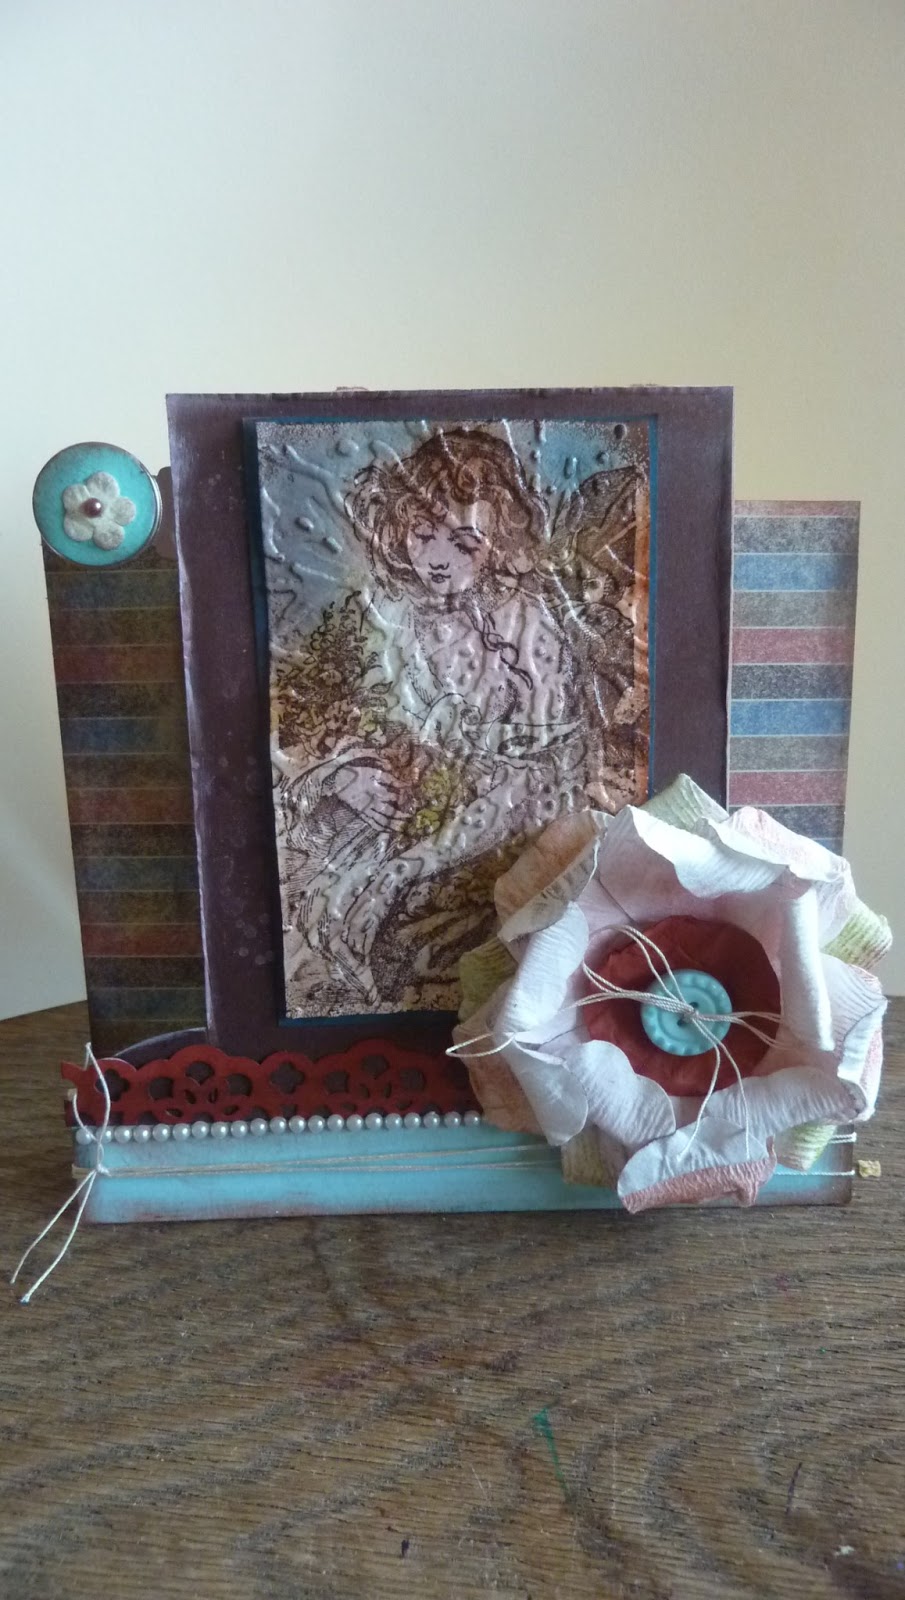
 a centre fold card is easy even for a non-measuring type of chick like me. for instructions go to splitcoast stampers  and they are very simple to follow. i used some retired su dsp for the stripes and an old fashioned stamp from my stash as the image.
 i wanted the image to look old so put it through the big shot with a broken window embossing folder and then put clear embossing over the top
i also added some embroidery string, flowers from a reverse garbage trip, punched out trim  and a row of small pearls.
i hope my swap girls like them
cheers ears

Thursday, January 27, 2011

wedding album

 my neice got married this month 
so i created this unique wedding album for her as my gift to her

i used 2 kaisercraft fairytale castles 
and added stampin up's beautiful love letter and newsprint designer series papers
along with a huge collection of accessories such as
ribbon, glitter, chipboard, antique tags, lace, brads, flowers etc etc
plus the obligatory stamps of course :>

normally when i do an album i usually keep it very simple and clean cut
but being the new year and wanting to try new things
i thought i would unleash my inner vintage/shabby chic/visual feast monster upon the world.
i also had limited supplies i.e. what i had brought with me to nz from sydney
so no zipping into the craft room to get stuff.
it also made me use what i had and think up different ways to use them.
i am glad i did this because it made me use a lot of my die cuts more and papers in different ways.

scroll on down for pictures of what it looked like inside....warning there are loads of them!!!!
if you see somethign you like and want to know how i made it or did it please feel free to ask :>


tomorrow i'll show you the card i made
and how i had to wrap it all up-that was a mission all in it's own!!!

cheers ears

Saturday, September 18, 2010

big shot blog hop

big shot blog hop big shot blog hop big shot blog hop
try saying that 10 times quickly.....eek! i keep wanting to say big shop blob hop lol anyways enough chit chat welcome one and all to the esad big shot blog hop for 2010 welcome if you are a regular to my blog welcome if you have come from sherylee's blog welcome if you have come from a random place in the internet!! we here at esad are a bunch of fanatical stampin up demonstrators from all over 'en-zed' and 'oz-tralya' who love what we do and share what we do with our friends, customers, other demonstrators and all of you out in blog land. we run swaps , cyberstamps, tutorials, challenges amongst other things as well as supporting each other when needed if you are already a stampin up demo then click here to join us. not a stampin up demo? then maybe now is the best time to join us so you too can be a part of our wonderful esad group! contact me today for more details about how to join my team! i recently bought the pennant die (rrp $74.95) on page 155 of the 2010/2011 Idea book and catalogue for the sole purpose of making name pennants and banners for my children and all their friends for birthdays as i had seen them around the internet and liked them a whole lot! it is a really simple easy die to use and makes very cool banners with a bit of colour added to them and some ribbon. here i have rolled daffodil delight all over a whisper white piece of card with the spot on jumbo roller. i coloured the edges with an aqua painter and some poppy parade ink. then i used versamark and white embossing powder to stamp my little girl's name (with a retired alphabet stamp sssshhhhhh lol) onto a poppy parade circle made with the circles #2 die (rrp$29.95). in between the pennants i have put flowers that were inked with daffodil delight and a poppy circle added to. i have tied it all together with some real red grosgrain ribbon and white taffeta. now when i make one of these i ALWAYS end up with bits...loads and loads of off-cuts and bits just like the picture above. this time i thought about it a bit harder and wondered about what i could use them all for...because it is such a waste. sooooo...with a 3 year old birthdya coming up soon i thought i would make it a useful project and use what i could to have a birthday theme. this is what i came up with! and i still have left overs i am going to use for cards which i will show off over the next few weeks. i cut out too many pennants so i used one for a birthday hat for the birthday girl just added a bobble on top and a strip of card for a head band i have used the party hearty stamp set i had another spare pennant that i turned on it's side and made into a flag i used a kebab stick for the handle and tied soem ribbon to it i also had a lot of scallop circles left over so made these simple badges for the party guests to wear..the pins are stuck on with crystal effects...did anyone tell you how useful that stuff is??!! lolly bags were made with a strip of poppy parade card and yet more spare scallop circles with our cello bags see! one happy little camper with her fabulous hat holding her lolly bag, waving her flag and wearing her badge next i set to work on the left over bits of pennant and turned them into cupcake toppers with the help of a toothpick nothing like a lamington to use as a model for my cupcake toppers lol!! these leftover bits were used to make bigger toppers for the cake i alternated poppy and daffodil cupcakes on the scallop circles pleae excuse the piddly little cake but i can assure you a bigger better model will be made for miss 3' real birthday!!! hopefully that has given you some ideas to work to make your child's birthday very cool! also keep an eye out here as i show you some more creations using the pennant die over the next couple of weeks now that's all from me and you can hop on forward to andrea's blog and see all the cool creations at her place don't forget to leave a comment (i love comments :>) and if you are not a stampin up up demo please send leonie an email that you have to be in with a chance to win yourself some lovely jubbly blog candy from all of us esad blog hop girls!! cheers ears