Showing posts with label vintage. Show all posts

Sunday, October 20, 2013

wedding card box

my awesome nephew and his beautiful fiance got married last week and i headed home to nz for the wedding. 
it was just devine.
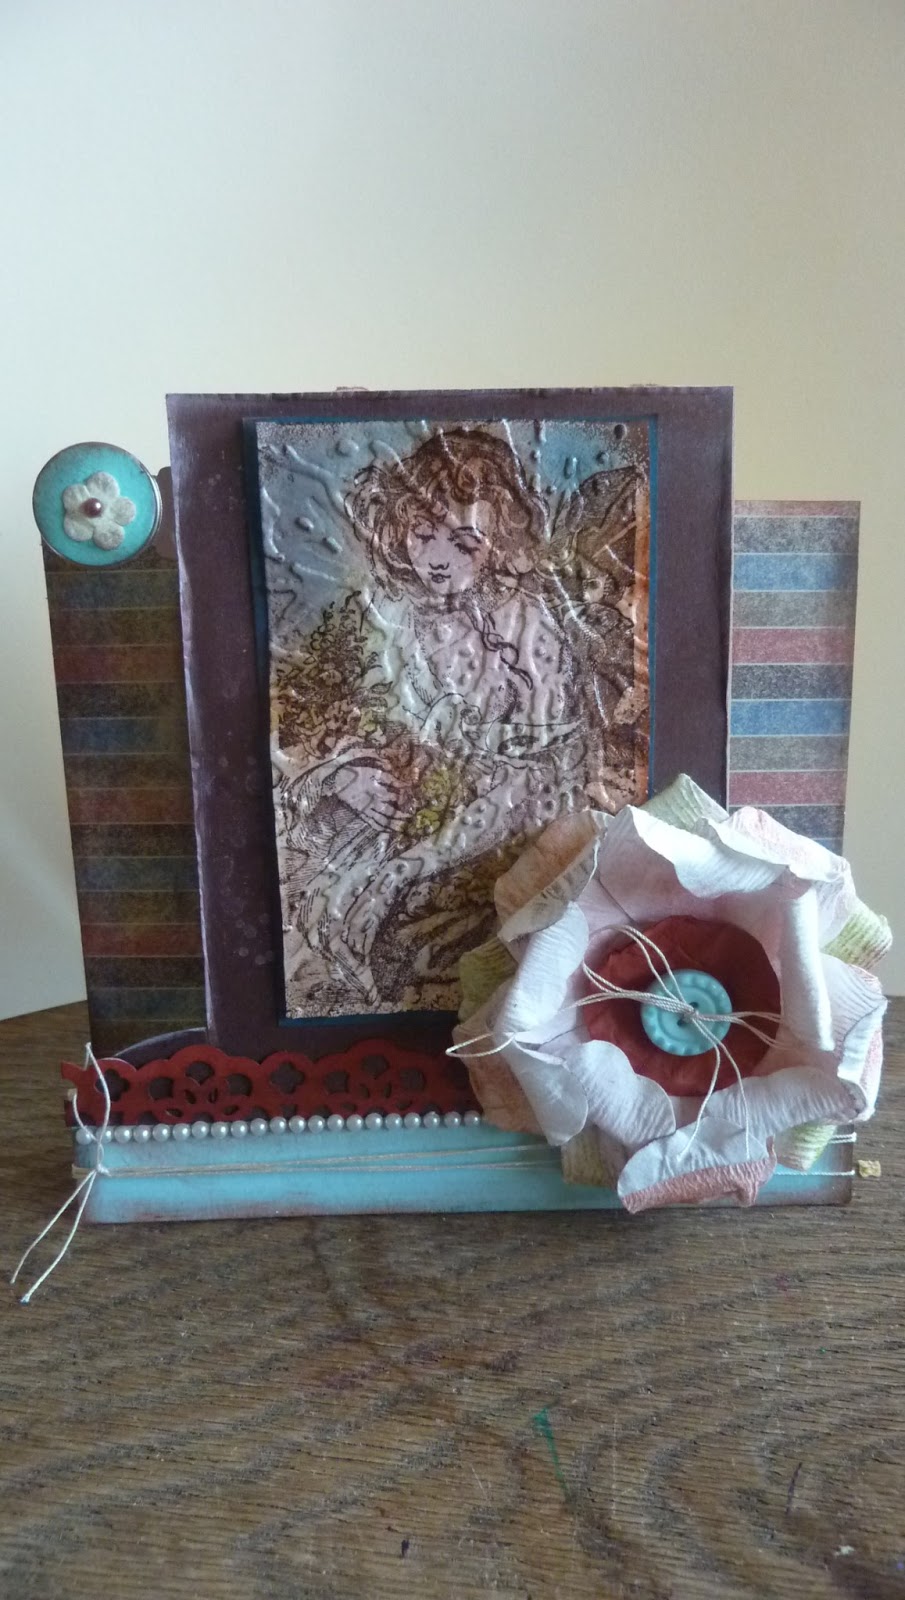
i wanted to give them a handmade gift and used their wedding invitation as inspiration.

the card was all lacey and vintagey looking. 
i layered the card with a variety of lace and trim from my stash and a luxurious red satin ribbon
dsp was from stampin up and i added some rub-ons to give it a bit more of a vintagey feel

the card box was actually a recipe box from kaisercraft but i adapted it.
i wanted something useful but pretty adn got the idea of a wedding card box off the interwebs.

 the top of the box uses the same lace and trim as the card. 
i also added some suede paper flowers and stamped the paper with the retired elements of style stamp set. the box was painted first with razzleberry ink and then once the dsp was on i sponged more ink aroudn the edges.
 inside i decorated with the stamped card and some dsp.
 the combined package.
made it safely all the way to nz thank good ness.
the beautiful couple

take care

cheers ears

Thursday, September 26, 2013

o holy night

o holy night
a new stamp set from the 2013 seasonal catalogue
a stamp with loads of words on it
and i like it :>
 have tried and gone with a vintage look with it and combine it with a bit of a chalkboard look as well...
vintage chalkboard...
that works..
right??!!
  
 sparkley glittery leaves made with just plain whisper white and glitter not the glitter card which would also work-i just don't like using it on those small fiddley little dies
 matching tags
some suede flowers and seam binding ribbon
total package of card + gift box + tags

doing it as a christmas class if interested
i have a special deal going if you ahve friends lololol
contact me at clare@crafty-cow.com

cheers ears

Wednesday, July 17, 2013

using up your stash

stash
it is a nasty word
especially when you have a bit of it and need to use it up
i am trying to cut down on my random purchases this year and use what i have got first
HAHAAHAHAHAAHAHAHAAHAAHA i hear you laughing because WHAT CRAFTER IN THEIR RIGHT MIND hasn't said that before riiiiight?!

anyways my friend sal gives us cardmakers these really cool swaps to do over at essential baby  and i try really hard to use stuff that i haven't touched at all or can't remember the last time i used it. our challenge was to do a centre step card and use stripes and people.
 a centre fold card is easy even for a non-measuring type of chick like me. for instructions go to splitcoast stampers  and they are very simple to follow. i used some retired su dsp for the stripes and an old fashioned stamp from my stash as the image.
 i wanted the image to look old so put it through the big shot with a broken window embossing folder and then put clear embossing over the top
i also added some embroidery string, flowers from a reverse garbage trip, punched out trim  and a row of small pearls.
i hope my swap girls like them
cheers ears

Saturday, November 19, 2011

a girly retirement card

a teaching colleague of mine is retiring this year and i offered to make her a farewell card
this is what i came up with
 the background paper is presto patterns and i have sponged some red, grey and gold ink to it
you can see the background better here when i show it in a better light
i added some vintage lace ribbon, some beaded pearls and a ribbon flower to the side. 
 the wooden mannequin was inked in black (with a touch of gold) and i added some red and white pearls to it.
the sentiment was done using the teeny tiny sentiments set-man oh man is that set useful!!!
 with it being a group card i needed to have enough space on the inside for people to sign it.
so i added some 'shelves' with tags on them for people to pull out and sign
 on the tags i used some plain black stain ribbon and stamped a squiggle from tiny tags in gold.

hope this special teacher likes her special card

cheers ears


Thursday, September 1, 2011

timeless portrait creative crew

for the next few months you will see my work for the creative crew at split coast stampers
woohoo!!!
it is soooo exciting to be part of their design team!!!
check out their challenges for september

here is my design idea for the timeless portrait challenge
our challenge was to use the colours from the timeless portrait collection
river rock, basic black, cherry cobbler, very vanilla and island indigo
and keep it to a school based or children theme

 well here are my monkeys set in a frame (actually it is a mirror!) that i have transformed.
i have sanded down some of the edges and rubbed some indigo ink into the frame. 
i also rolled some musical notes over the frame which you can only see in a certain light-obviously NOT the one i took the photo in lol
 on the right hand side i added some cherry cobbler paper ribbon all rouged up
i added some basic black striped grosgrain ribbon 
and stamped some elements from the forever young set with 
some crystal effects on top of the cameo silhouette
the trees on the side are done with white embossing powder
(handy tip-if you are planning on doing this make sure you go over the frame extensively 
with your embossing buddy to really get rid of any static!!)
down the bottom left i added another littler copy of the main photo 
to some more ribbon and vintage brads.
i also coloured some retired christmas ribbon with a marker to add some indigo highlights 

looking forward to seeing what everyone else creates with this challenge

cheers ears

Monday, August 22, 2011

card in a box

what is that you ask?

it is when you make a sample card and then put all the ingredients into a shoe box
(well in MY case it was a chocolate fundraising box lol)
and let others make your sample

this was mine recently i made up for a super fun weekend away with my inklings family
 it involved a bit of embossing and sponging much to everyone's delight 
(read some sarcasm there hehehehe)
the flower embellishment was made using crystal effects to get it all shiny.

1.Take 8x13 white/vanilla card stock and stamp phrase from inspired by nature approx 1/3 of way down in staz on. Use a samj if you want perfect placement :>
2. Rub over card with embossing buddy.
3. Take flower stamp from elements of style and stamp in top left and bottom right corners with versamark.
4. Sprinkle clear embossing powder all over and heat with heat gun until melted.
5. Using your nail (or distressing part of cutting tool) give the edges a bit of a rough up :>
6. Take river rock and sponge over middle of card.
7. Take suede and sponge around middle and edges.
8. Take choc chip and sponge edges.
9. Spray twice with gold spritz. Leave to dry.
10. Take peice of naturals ivory. Rub with embossing buddy.
11. Take for you stamp from elements of style and stamp ENDS ONLY onto edges of card with versamark.
12. Add clear embossing powder and melt with heat gun.
13. Take suede and sponge randomly over edges.
14. Take choc chip and sponge edges.
15. Attach choc chip card to middle.
16. Attach stamped cardstock to choc chip.
17. Punch scallop circle out of card stock.
18. Cut into middle on every second scallop. sponge edges with river rock ink.
19. Put flower through crimper. Attach to bottom left of car with a dimensional.
20. Punch out a ¾” circle from choc chip. Attach to middle of flower with dimensional.
21. Stamp small heart from tiny tags in stazon. Punch out with ½” circle punch.
22. Attach to choc chip circle in flower with tombow.
23. Cover middle of flower with crystal effects. Leave to dry.

Monday, July 4, 2011

beach boy

this month i am offering a vintage themed scrapbooking class
and here is what we shall be making if you are interested

 instead of using real photos i got some old photos photocopied so i could play with them
 we will learn how to make these pretty embellishments
 how to use a blender pen to colour black and white photos
how to use a crimper, collage stamping and putting fancy corners on our pages :>

check out my classes page for more details

cheers ears

Tuesday, March 22, 2011

creative challenges

this year part of my creative goal was to start taking part in more challenges to get ye old mojo working and taking me out of my comfort zone.
you can check out the places i have found to find challenges here

was to use the following colours:
and here is my creation!


 i have used an old plastic embellishments (buttons i suspect!) container
and otp'ed it!!! (is that even a phrase??)

i used a variety of circle punches and the xl fancy flower punch to make the flower on the top.
i stamped the large squiggley pattern from the bliss sale-a-bration set over them all with black and razzleberry and sponged the edges with old olive, razzleberry and crumb cake.
right plonk in the middle i have added a old olive rhinestone brad
 i added some pretty black 1/8" taffeta ribbon and a couple of pearls, diamantes and a button.

 on the side i added a couple of tiny tags tied on with a fine piece of linen thread.


now here's the tricky bit...

what do i use it for? what should go inside? 
any ideas?

cheers ears

Wednesday, March 16, 2011

thank you

this week i started back at the coal face that is primary school teaching.
i am currently a relief on-call teacher so can go any where at any primary level on my work days.
it's all new teaching here in australia for me and it is a bit like being a beginning teacher again...
but with balls lol

my first school had the most friendliest office lady i have ever met
(you DO know they are the ones that REALLY run the school don't you??)
who patiently helped me fill in forms and talk to the tax department and fax pay forms 
all with a smile, a sense of humour and a cheerful disposition.

so i thought that she needed a card from me


just add ink had a sketch challenge this week that i thought i would use to help make my thank you card.
it seemed to be perfect for what i wanted to achieve.
 i used the sweet summer set from 
sale-a-bration to get a vintagey-feel kind of card. 
i got some confetti cardstock and some sahara sand ink to get my colours going and added some vintage lace and some copper wire for my bow and a tiny bit to the 3d butterfly. i added some tiny pearls to the top of the flower and gently sponged everything down.


 i also did the inside to make it all look pretty too :>

must remember to send it off asap

cheers ears

Monday, March 14, 2011

vintage baby album

a good friend recently had a beautiful baby girl.
she is also a huuuuuuuuge jane austen fan.
i thought i would try and combine the 2

the cover of the album is a box made from thick brown card. i sponged ink all over it with soft suede, concord crush and river rock. i rolled the musical notes wheel over it and embossed with gold on the cover to help age it. i added some vintage lace and matching ribbon plus some pretty pink pearls.

Inside i added an accordion album made from kraft card with the lap of luxury dsp as a highlight. 
the kraft has been rolled with the musical notes roller 
and sponged with suede and river rock and concord crush.
i have to fess up that i originally loathed the l.o.l dsp 
but since being on my vintage roll i am finding it very suitable for such things as it just 'fits'
....go figure huh?!
now just before putting the accordion album in, 
i stuck some pink taffeta ribbon inside so it could tie up and not explode all over the place. 

see how it all fits nicely into the box part? 
cool huh?

here's a bit of detail from the front of the album.
i used vintage lace and the scallop edge punch with a hole punch out of it. 
then i added a pink bow and a tiny paper flower i had coloured in with a tiny pearl in the middle.

hope the recipient likes it

cheers ears

Thursday, January 27, 2011

wedding album

 my neice got married this month 
so i created this unique wedding album for her as my gift to her

i used 2 kaisercraft fairytale castles 
and added stampin up's beautiful love letter and newsprint designer series papers
along with a huge collection of accessories such as
ribbon, glitter, chipboard, antique tags, lace, brads, flowers etc etc
plus the obligatory stamps of course :>

normally when i do an album i usually keep it very simple and clean cut
but being the new year and wanting to try new things
i thought i would unleash my inner vintage/shabby chic/visual feast monster upon the world.
i also had limited supplies i.e. what i had brought with me to nz from sydney
so no zipping into the craft room to get stuff.
it also made me use what i had and think up different ways to use them.
i am glad i did this because it made me use a lot of my die cuts more and papers in different ways.

scroll on down for pictures of what it looked like inside....warning there are loads of them!!!!
if you see somethign you like and want to know how i made it or did it please feel free to ask :>


tomorrow i'll show you the card i made
and how i had to wrap it all up-that was a mission all in it's own!!!

cheers ears